Direct, Indirect, SSS (intermediate) passes
In this tutorial, we move down the levels of complexity into the Intermediate category and explore breaking apart diffuse, specular further into Direct Lighting, Indirect Lighting, and SubSurface Scattering


What is Direct Lighting?
- Direct Lighting is when the Light Source directly illuminates a surface. This could be considered the “first bounce” or the first time the light ray is hitting a surface.

What is Indirect Lighting?
- Indirect Lighting is all subsequent bounces of the Light. This can be known as “Bounce Lighting”. Light is often diffused throughout the scene, and also will pick up some of the surface colors.

Direct and Indirect Passes as rendered / calculated separately and combined to equal the beauty render. Direct is only the “first bounce” or whatever is directly in view of a light source. Indirect is all bounces after the first hit (excluding the first bounce).

Direct and Indirect Lighting in the real world is used to describe a harsh lightsource, directly hitting a room or object and casting harsh shadows, verses indirect or “bounce lighting” which the light is aimed at a wall or ceiling or bounce card, and diffused throughout the scene, creating a more ambient lit environment.


Raytracing – Direct Lighting

- Ray tracing is a render calculation used to find Direct Lighting, shadows, and specular highlights.
- Instead of calculating from the Light Source outwards and every direction in the scene, it saves time by going from the Render Camera backwards, only needing to calculate light rays hitting the camera, and necessary for the creating the final image.
- It starts from a pixel on the final render and follows the light path until it reflects off or through a surface/material. It then asks “Am I directly illuminated by a light source?” and if so follows the path back to the light source, and determines the distance, intensity, and color of light hitting the surface.
- If the area is not hit by direct light, it renders as black. This calculation ends after the “first bounce”.

Global Illumination “GI” – Indirect Lighting


- Global Illumination or “GI” involves various techniques to calculate the indirect lighting that occurs when light bounces around in a scene.
- This process helps to subtly illuminate shadowed areas and contributes to the overall color and intensity of the scene, especially around areas that are hit by direct lighting.
- There are often many number of bounces allowed, depending on render time and settings. Each bounce inherits color from objects and materials and further distributes light into the scene.
- The result is a more realistic and natural-looking shot, as it mimics the complex ways light interacts in the real world.
I mention this amazing Raytracing video from Josh’s Channel that breaks down how raytracing is working in the renderer with amazing visuals. The video itself is amazing, and entertaining. I highly recommend watching the whole video if you want to know about state of the art raytracing techniques.
The section I clipped from Josh’s video is between 1:24 and 2:14
Direct + Indirect = Total Lighting


Image Property of DreamWorks – SIGGRAPH 2010

Image Property of DreamWorks – SIGGRAPH 2010
Real Time Raytracing / Global Illumination – RTX Graphics
Real Time Global Illumination, is becoming the new normal in Real Time Renderers such as Unreal Engine and Unity. More powerful Graphics cards are being upgraded to handle these immense calculations, such as Nvidia’s RTX 3090 or 4090 series graphics cards. These are allowing for real time bounce lighting and reflections, instead of traditionally baked lighting in environments. This all adds significant realism to the scenes and games, and shows just how important this process is to photo realism.


How can we use Direct & Indirect Passes in Compositing?
1.) Contrast / Color Correction


- Individual control of the mids/lows and highlights. Gives more flexibility over the color correction in order to increase or decrease contrast and better match CG to plate.
2.) Filters and FX

- Adding glow filters to Direct Lighting pass to “punch” the lighting and adding some realistic camera lens fx. Using direct or indirect lighting passes to drive other FX and filters.
3.) Denoising CG
- Indirect passes (and Sub Surface Scattering) are very expensive renders, and often arrive with some unwanted render noise and chattering. Instead of applying denoise techniques to the whole beauty render, applying denoise to only necessary passes can help preserve details and improve final quality of your renders in comp.
CG Denoising Techniques in Nuke
1.) Nuke’s Denoiser


We can simply use Nuke’s built in denoiser, it is the easiest to test and doesn’t do a bad job after some settings adjustments. No plugin or external tool required
2.) Neat Video Denoise Plugin


https://www.neatvideo.com/
Neat Video is the best denoiser on the market. It is fairly affordable, and chances are your studio already has a license. It can be a bit heavy, I would recommend pre-rendering the results instead of leaving them live in your comp script.
3.) Motion Vector Denoise

This technique involves using the Motion Vector Utility pass to distort the previous frame and next frame’s pixels, back into the position of the current frame. Usually you see a 3 frame average, or 5 frame average, (current frame, +2 frames ahead, -2 frames before).
It’s also common to use a TemporalMedian Node to help smooth out noise chattering over pixels that are not changing that much frame to frame.
It’s important to note that we should always try to minimise artifacting and quality loss by isolating degrain techniques to only the problematic render passes, and not every layer or the beauty overall. Typically most of the problematic CG noise is occurring on the Indirect and SubSurface Scattering Passes.


Some Great tools for Motion Vector Denoising:
Vector Median:
https://www.nukepedia.com/gizmos/filter/vectormedian
Deflicker Velocity:
https://www.nukepedia.com/gizmos/time/deflicker-with-velocity-pass
I do believe more tools could be made using these techniques and shared with the community. If you want to have a go at using this technique to come up with different tools that reduce grainy CG while minimizing artifacting, I am sure the Nuke community would be grateful!
Downloads:
If you haven’t downloaded the FruitBowl Renders already yet, you can do so now:
You can Choose to either download all 3 FruitBowls at once:
FruitBowl_All_Renders_Redshift_Arnold_Octane.zip (1.61 GB)
Or Each FruitBowl Render Individually for faster downloads:
FruitBowl_Redshift_Render.zip (569.1 MB)
FruitBowl_Arnold_Render.zip (562.8 MB)
FruitBowl_Octane_Render.zip (515.4 MB)
The project files and the Renders are separate downloads, so if you have already downloaded 1.1 What and Why files or the Fruitbowl Renders, there are a couple ways to combine them to work.
- Either add the .nk script to the previous package (in the folder above SourceImages, with the other .nk scripts)
- Or simply drop the Render files into the SourceImages folder of the new 1.2 project folder

Project Files for this Video:
Along with the fruitbowl renders above, here are the nuke script and project files from this video, so you can follow along:
Nuke Project File:
CG_Compositing_Series_MaterialAOVs_Intermediate_DirectAndIndirect.nk

Blender Cube Room Diorama zip ( 3 renders ~ 70MB each, zip file total 204.4MB)
original cube diorama blender files from blender demo file site:
https://www.blender.org/download/demo-files/

Cornell Box noisy Render zip (1.55GB) exr img seq
Special thanks to Valentin Nicolini for providing the cornell box render
Please note the render is using ACES colorspace, so you’ll need to set your nuke OCIO settings to ACES to view this render correctly.

Vray Room – Can be downloaded from this website, look for “download example scene” (36.6MB):
https://www.chaos.com/blog/how-to-use-cryptomatte-render-elements-in-v-ray-for-sketchup

Vray Teapots can be downloaded from this website ~35MB:
https://www.lucamignardi.com/2-5d-relighting-nuke/
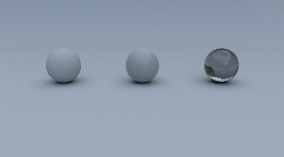
The Foundry spheres examples can be downloaded here:
https://learn.foundry.com/nuke/content/reference_guide/toolsets_nodes/toolsets_nodes.html
Since I am using Stamps in the script, all renders can be swapped out at the top of the script where the “SourceImages” Backdrop is, and the rest of the script will get populated correctly

Finally here is a PDF version of my slideshow in case you would like to save for future research or review:
Research links:
https://www.pluralsight.com/blog/film-games/understanding-global-illumination
https://en.wikipedia.org/wiki/Global_illumination
https://www.ledyilighting.com/direct-lighting-vs-indirect-lighting/
https://blogs.nvidia.com/blog/direct-indirect-lighting/
https://lightingdistinctions.com/direct-light-vs-indirect-light-how-to-make-the-most-of-both/
https://cg.informatik.uni-freiburg.de/course_notes/graphics2_09_pathTracing.pdf
Thank you for all your patience, I’m hoping to publish more tutorials in this series soon.
Best,
-Tony
