CG Compositing Series – 2.5 Material AOVs – Refractions & Reflections
Refraction & Reflection Passes (Exceptions)
In this video we aim to understanding the problem with refraction (transmission) and reflections (indirect specular) explore potential solutions. The problem with Indirect Specular (Mirror Reflections) and Transmission (or Refraction) passes is they reflect or refract the entire beauty of the environment, locking that information into 1 pass. There often seems there is not much we can do as compositors to separate those passes further.


Here we have a nightmare scenario from a AOV rebuild point of view: A glass jar full of balloons, that is also reflected in a mirror surface. Everything in the mirror Reflection shows up only in the Specular Indirect Pass, and everything seen through the glass jar shows up only in the Transmission (refraction) Pass.


We notice as well that objects that end up in the Transmission (Refraction) pass are missing from the Diffuse Pass.


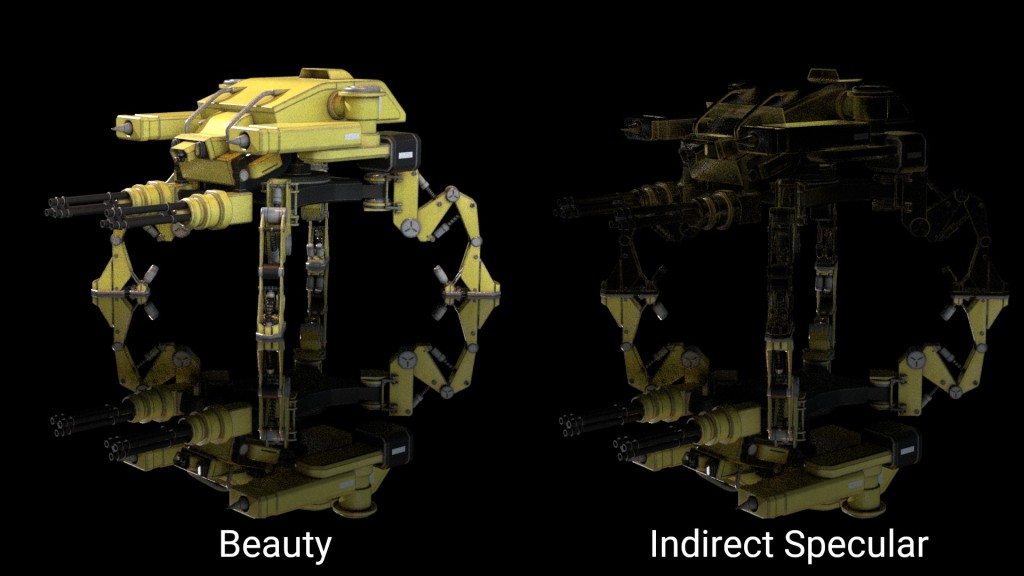
Mirror Reflections, for example ground plane reflections for our subjects, are also limited to the Indirect Specular pass:
What is Transparency?
- Transparency is the ability to see – through an object or surface to what’s behind
- It’s as if the object or material is ignored or nonexistent and does not have to do with Light interacting with the material.
- The light passing through is not Distorted (Refract), nor does Scatter or change Color (which could be the case with Translucency or Transmission)
Transparency basically has only 1 setting: Amount – or “How much can i see through this”

What is Transmission?
- Transmission is the passing of light completely through a material
- Refractive, Transparent, and Translucent materials all transmit light, but Opaque materials do not.
- If light is not transmitted, it may have been reflected (specular) or absorbed.
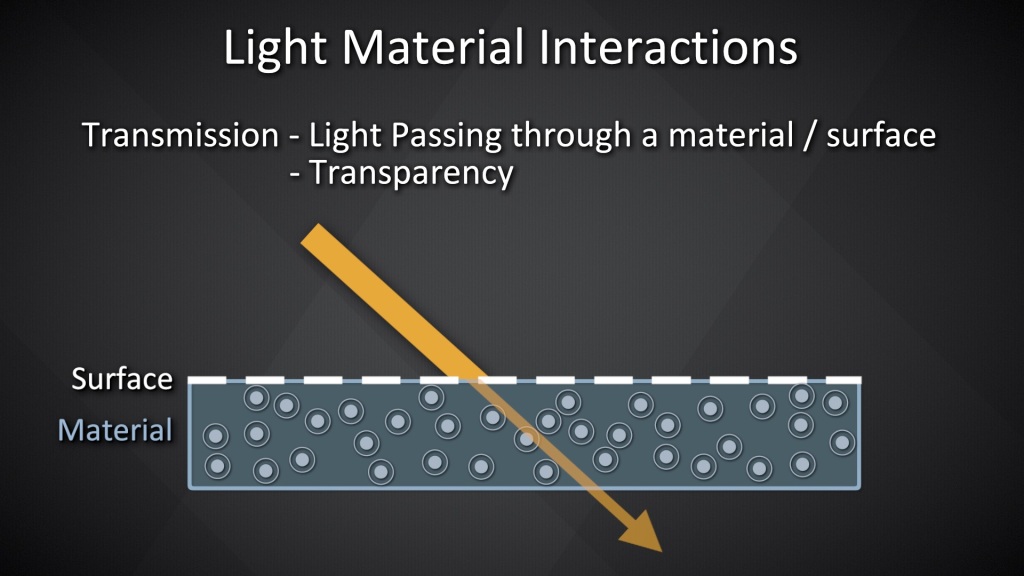
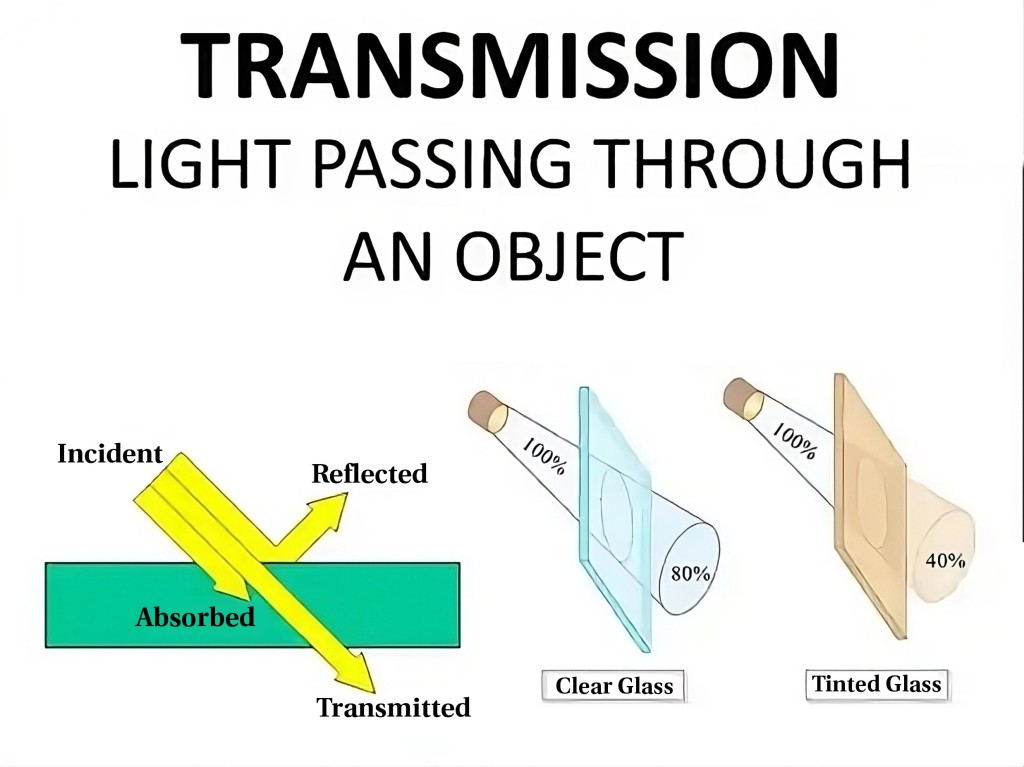
Transmission can sometimes cause the light to inherit a color tint as it passes through and interacts with the material. Think of colored liquids or tinted glass.

What is Refraction?
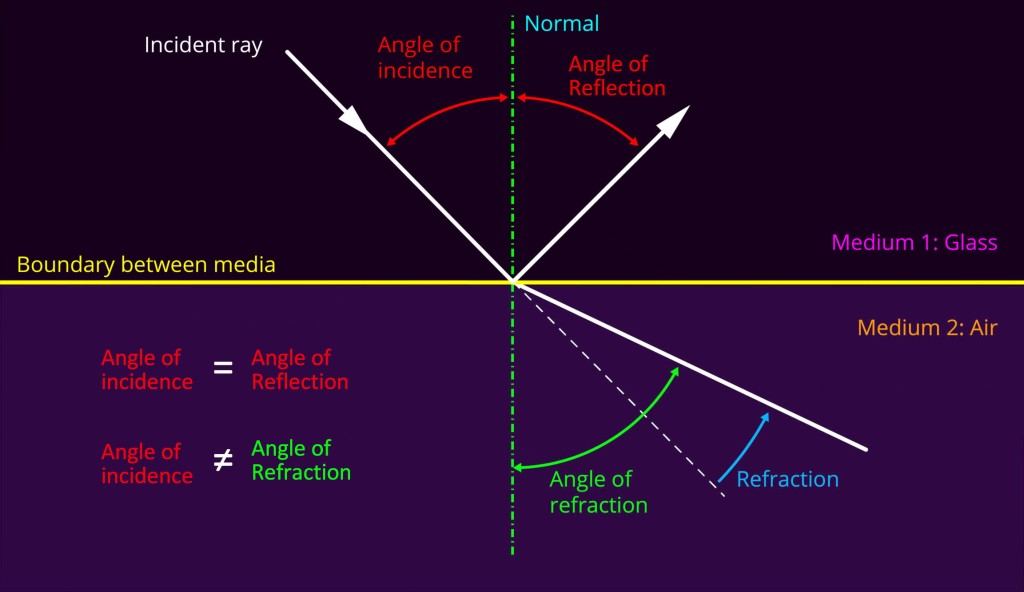
- Refraction is the change in direction and speed of a light ray as it travels through or “Transmits” through different mediums, ie. from Air to Glass or Water or Plastic
The 2 more important characteristics of Refraction are:
1.) The Light passes through the material
2.) The Light changes direction
- The amount of distortion, “bending”, or change in direction of a light’s path while passing through the material, depends on factor’s like:
- Thickness of the material, Angle of View, and the material’s Index of Refraction
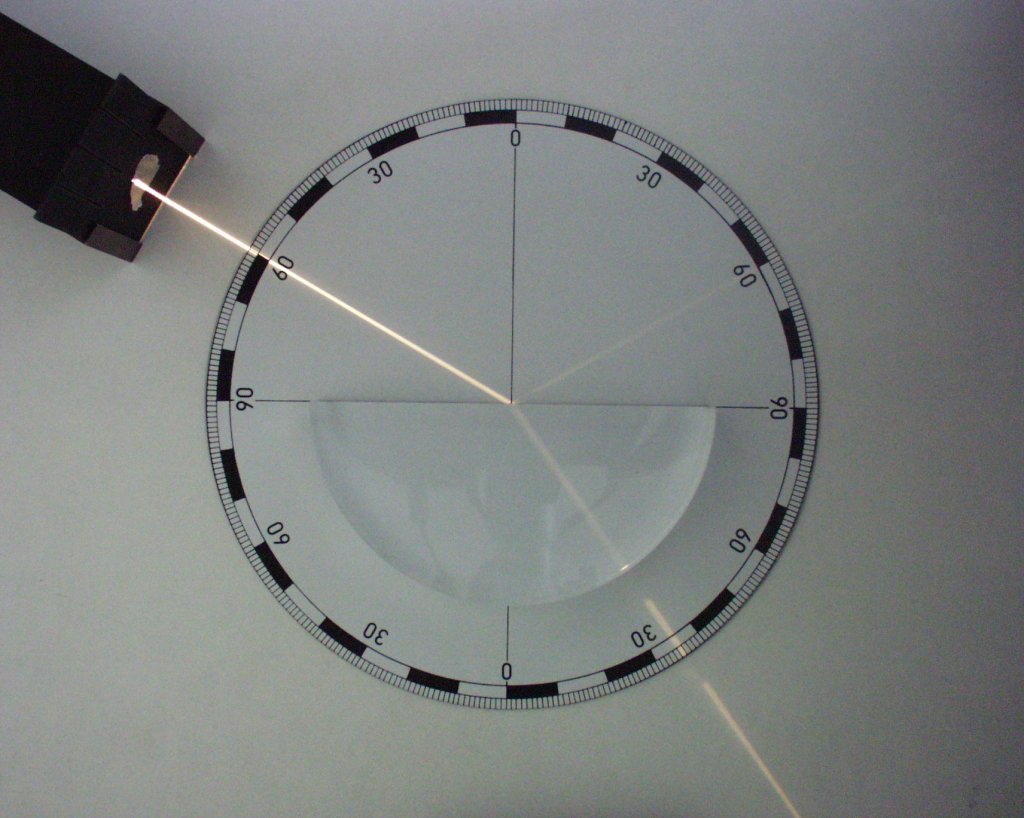


Refractions vs Transmission?
- Transmission is only referring to Light passing through an object
- Refraction is requiring the light to have changed direction, and to pass through
- The render pass is doing both things, so some Render Engines decided to call the pass Transmission, because it’s referring to light passing through the material
- Other renderers call the pass Refraction, referring to the Change of Direction, “bending” or distortion of the light
- Both terms in this case are referring to the same phenomena, just focusing on different aspects of the light’s behaviour
- Transmission might even be a more accurate label, because technically a material could have a Refraction index of 1.0, meaning no refraction/distortion is occurring, but the light is still Transmitting.
- All Refractions require Transmission
- Not all Transmissions require Refraction
Why is Light Redirected during Refraction?
- Light travels through different mediums at different speeds, depending on the density and make up of the medium.
- Examples of Mediums: Vacuum (space), Air, Glass, Plastic, Water, gases, etc.
- The change of light speed while passing from 1 medium into the next, causes the light to change direction when entering the 2nd medium.

Light Wave “Turning” or “Bending”
Light is a Wave:

One side of the wave hits the new medium and slows down first, turning/bending/redirecting the light wave towards a new direction.
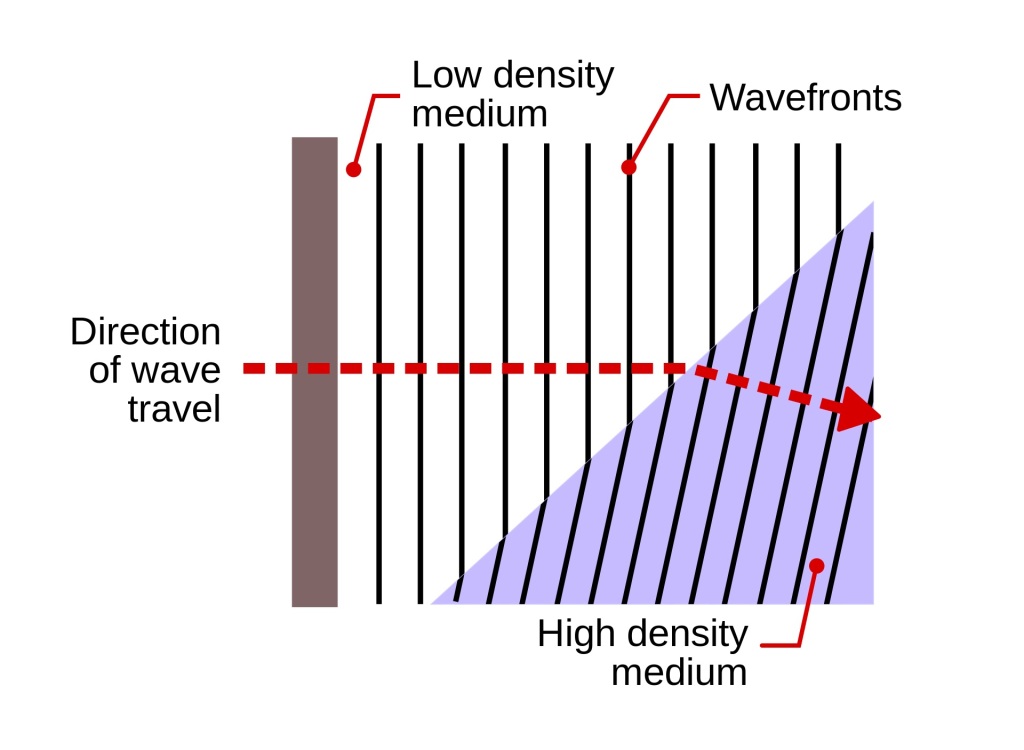


Color Light Wave Frequencies
Remember that Different Frequencies of Light Spectrum show up as different colors

Different frequencies of light refract at slightly different angles, causing the colors to separate. This is what happens with Color Prisms.

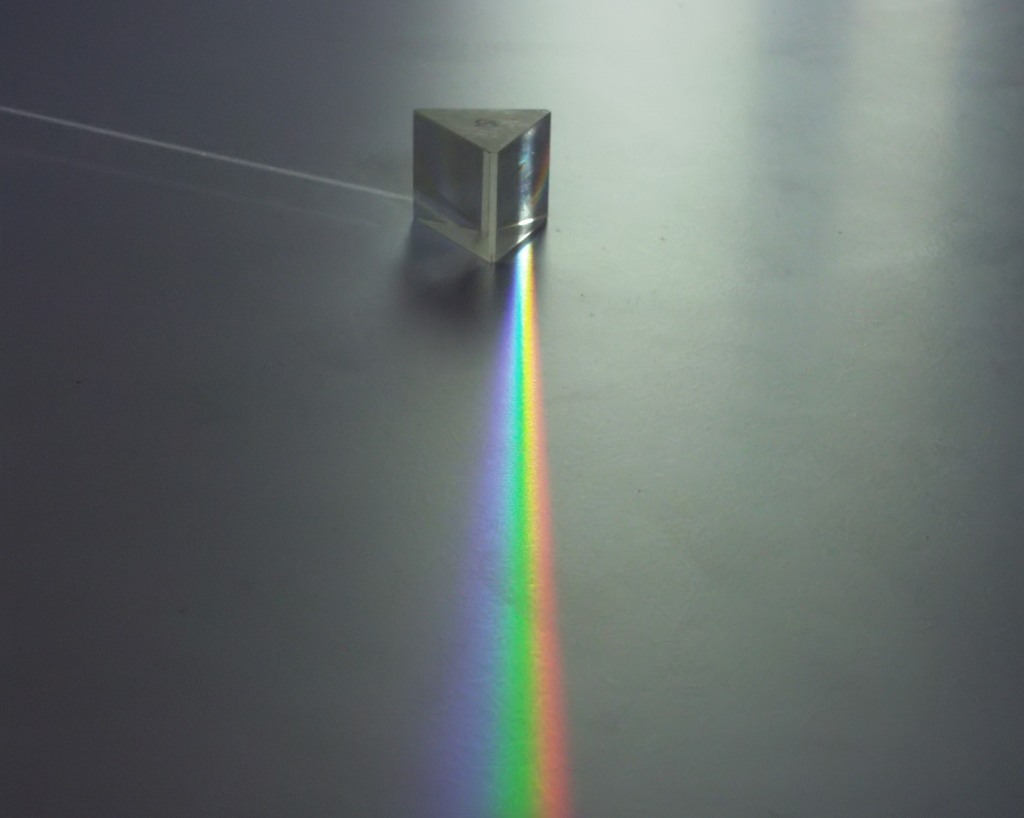

Refraction / Reflection in Rainbows
A Combination of this Refraction Color Separation and Reflections within water droplets is what allows us to see Rainbows.


Index of Refraction
- Different materials have different densities and make ups and will cause light waves to move through at different speeds
- This is measured with an Index of Refraction, which measures how fast light moves through that medium, and therefore how much it refracts
- An Index of 1.0 is light’s speed in a Vacuum – or no change in direction
- Higher numbers mean light travels through the medium slower and light bends more


In CG, this Index of Refraction is an attribute setting on Materials that will make it more or less refractive

Refraction Re-Entering Original Medium
- When the Light goes from a fast medium, to slower medium, and back into the fast medium on the other side, it has another refraction turn
- This time, instead of one side of the light wavelength slowing first, one side speeds up first
- If the exit angle is the same as the entrance angle, it will reverse the lightwave back to the original direction, and is parallel to the orginal light direction, just offset

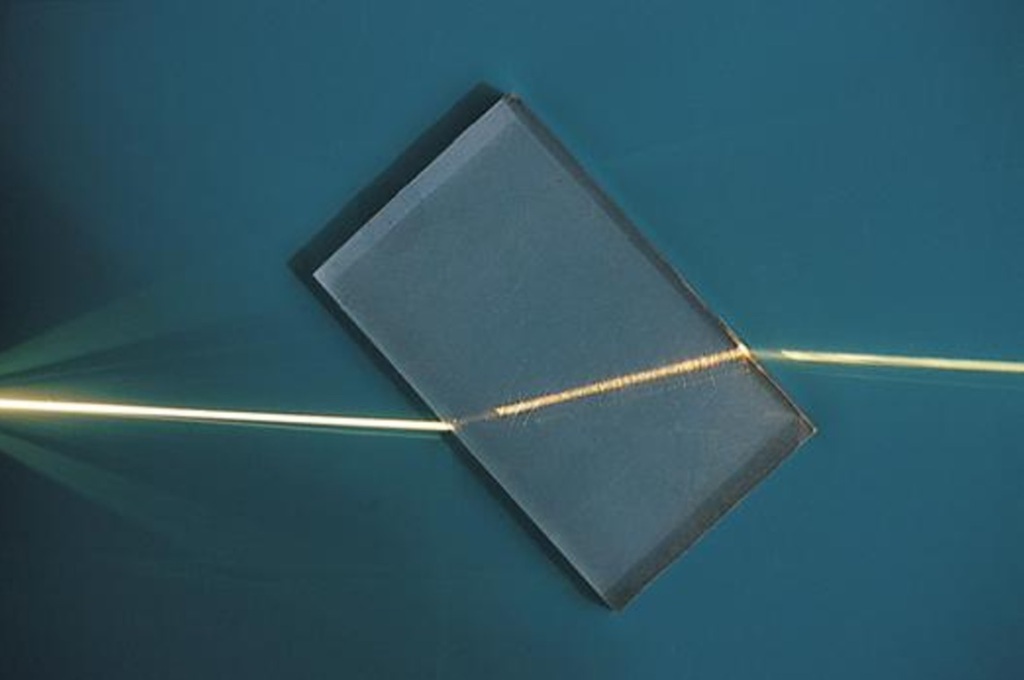

Refraction Angle
- The Angle that the light wave hits the surface also matters
- If the light hits the material exactly perpendicular to the surface normal then it will pass through and the light does not bend at all
- The more extreme the angle, the more refraction. This is why light appears most warped at the edges of curved surfaces.


This is exactly what causes lens distortion to be more extreme at the edges of frame vs the center of frame
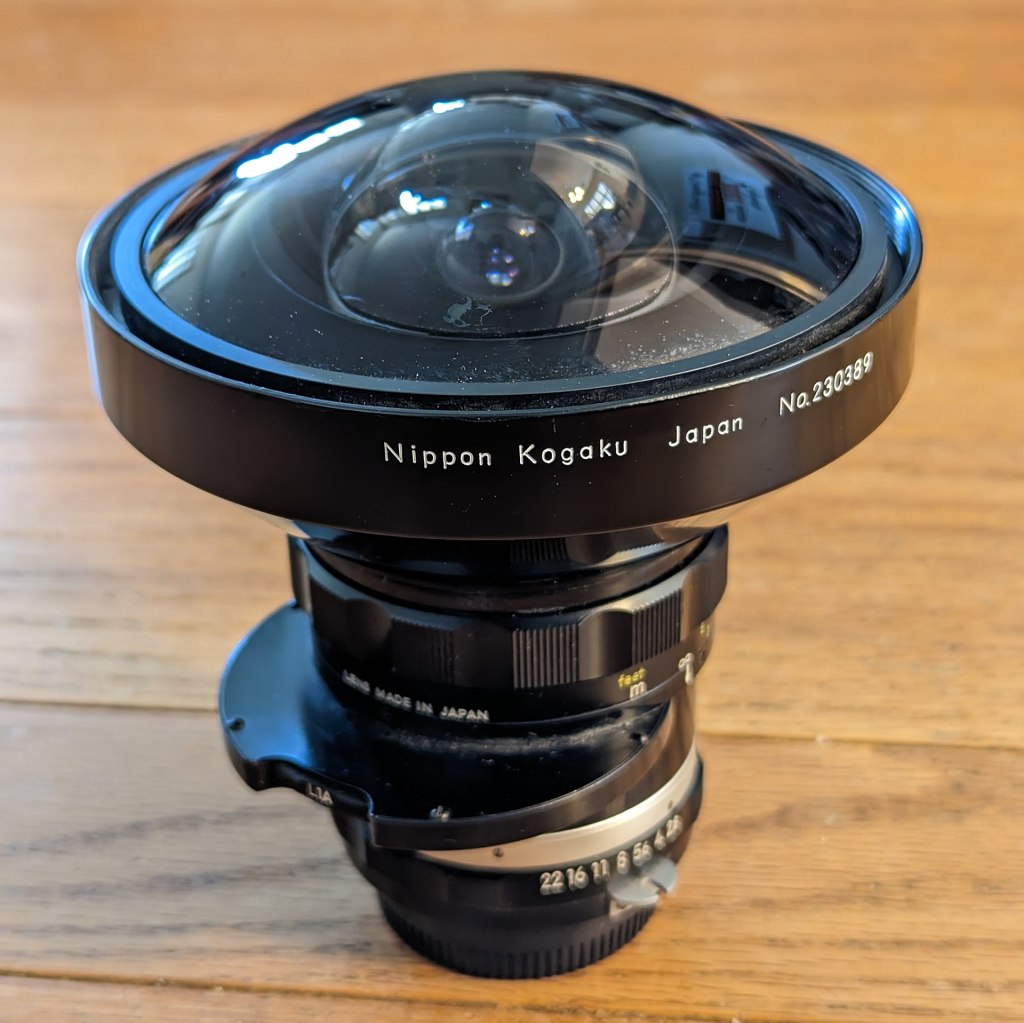
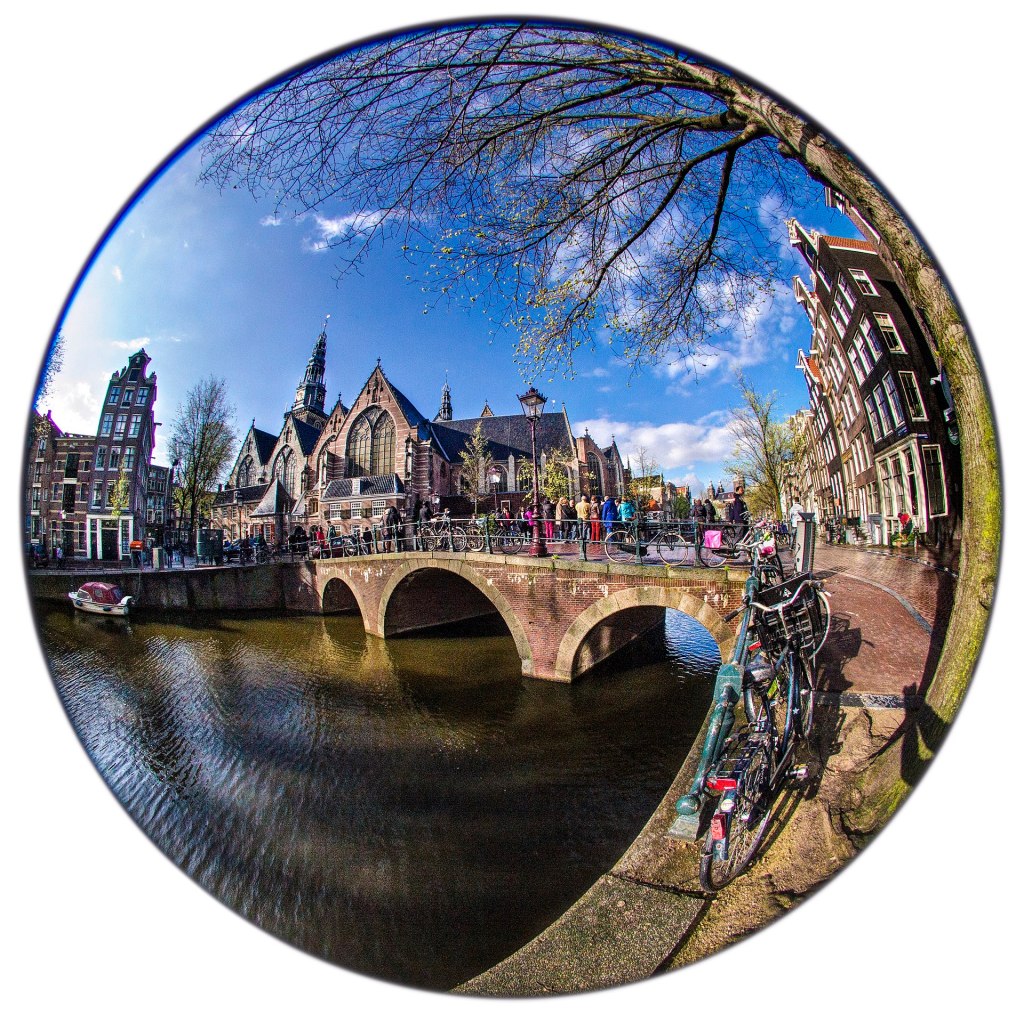

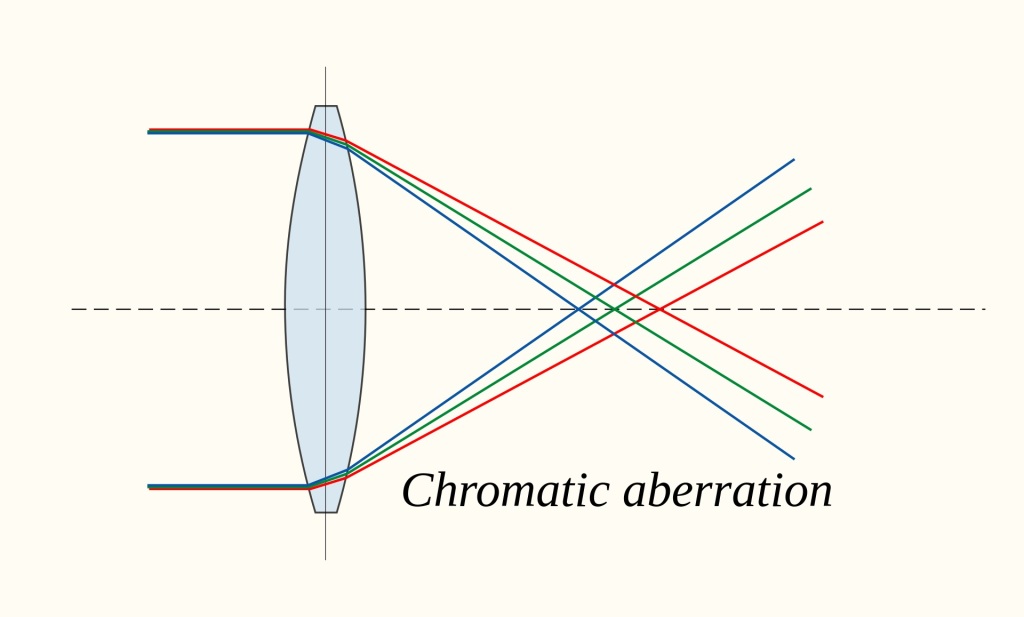
Chromatic Aberration
Combining the more extreme distortion with the Color separation is why we get Chromatic Abberation more in the edges of frame as well.


Caustics
Light Refracting through complex shaped objects, changes direction, and concentrate towards certain areas more than others and create Caustics.


Complex shapes create complex caustics, and moving surfaces, like water, create dynamic and organic moving Caustic patterns.

What is Translucency?
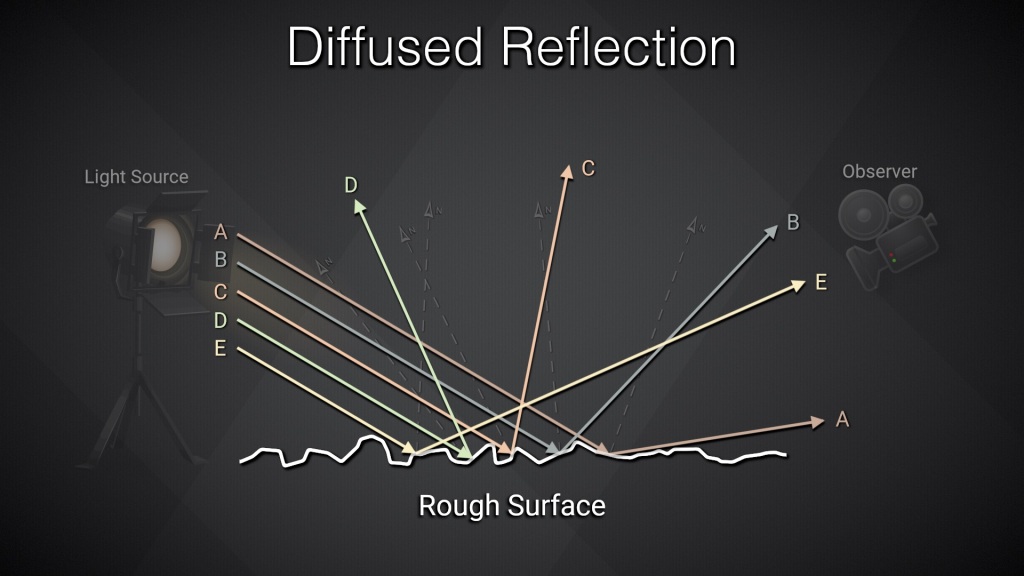
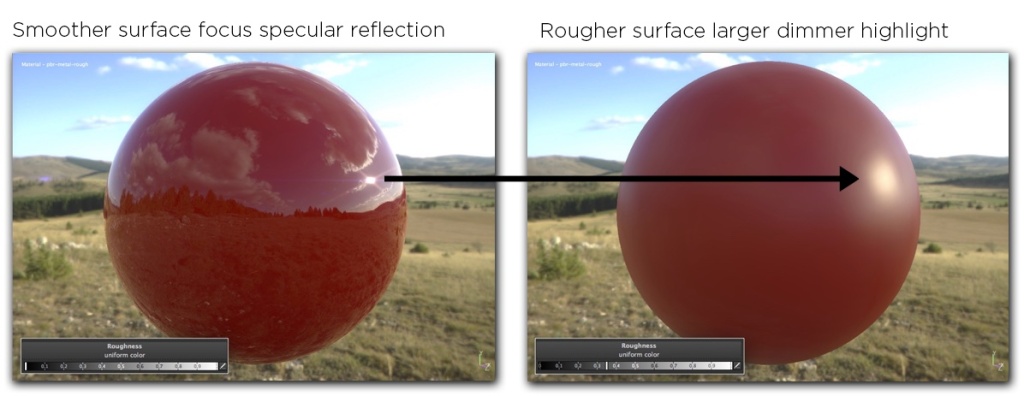
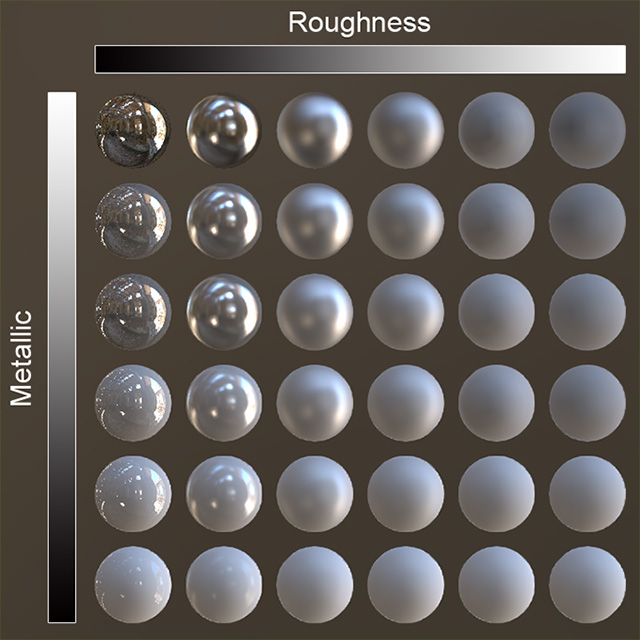
- Transmissive materials have a Roughness or Glossiness setting that works in the same way as it does on Specular Highlights
- Increasing the Transmission Roughness causes the light rays traveling through to scatter / “diffuse” or blur together. Think of Frosted Glass or Plastics.
- This effect of “Blurring” or Scattering the Transmitted light is called Translucency
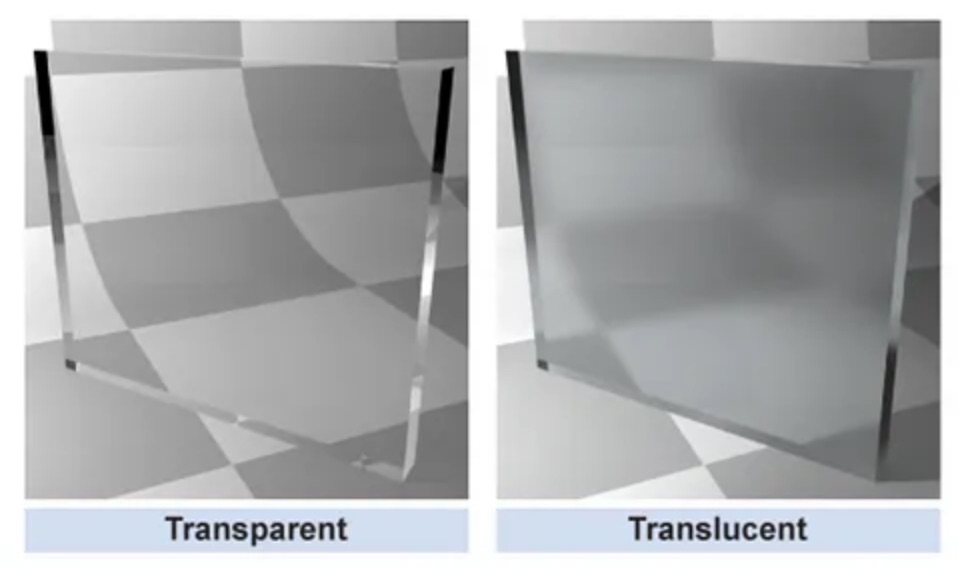


Roughness Blurs Everything Together
Specular Roughness Setting:
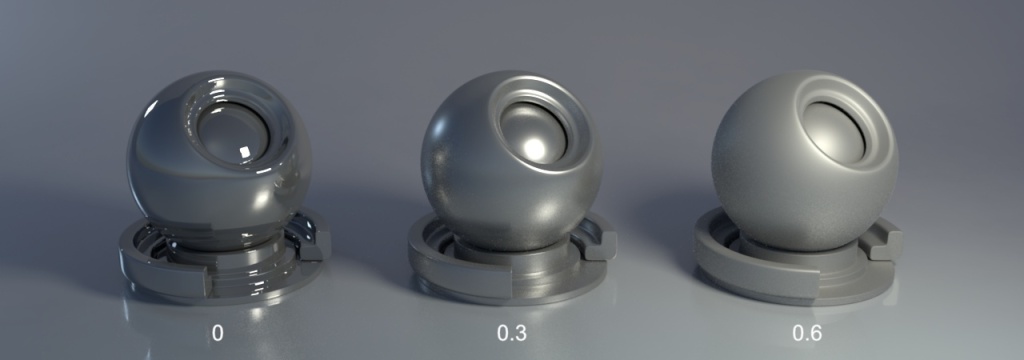
Transmission Roughness Setting:

Recap
Transparency – You can see through to BG, as if the material or object is not visible or ignored
Transmission – Light allowed to pass through the surface / material
Refraction – Light changes direction as it passes through the material / surface
Translucency – Light passes through material and gets scattered / blurred
Virtual Images / Worlds
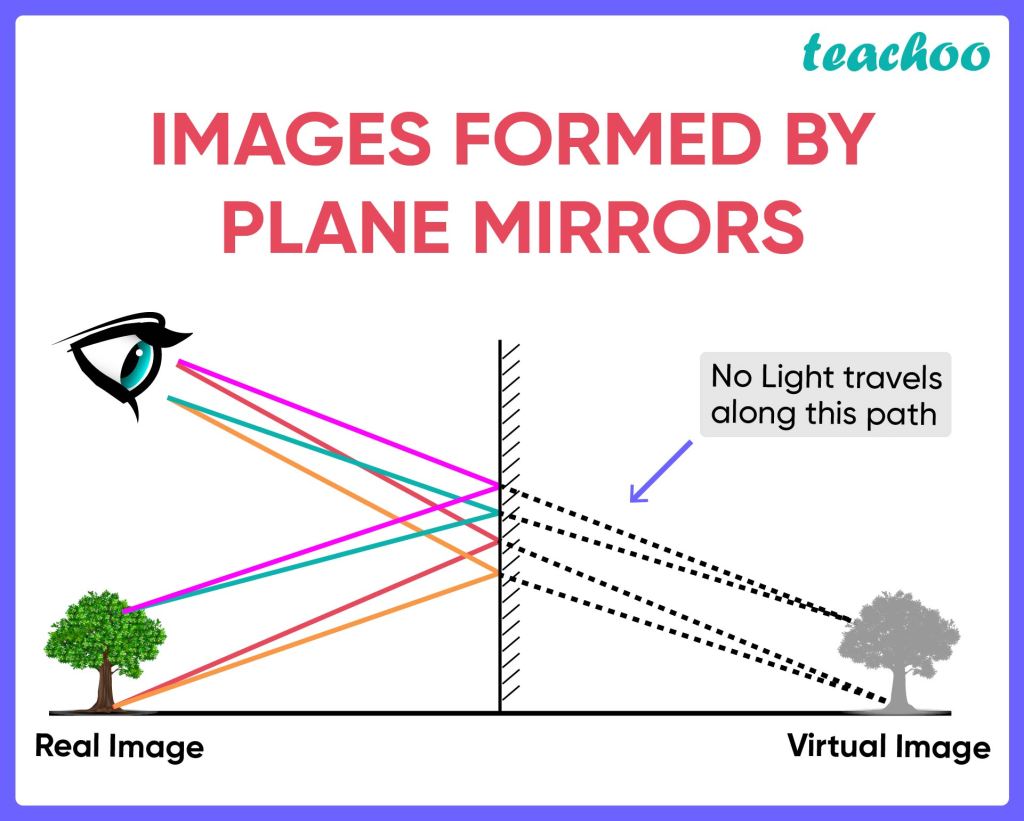
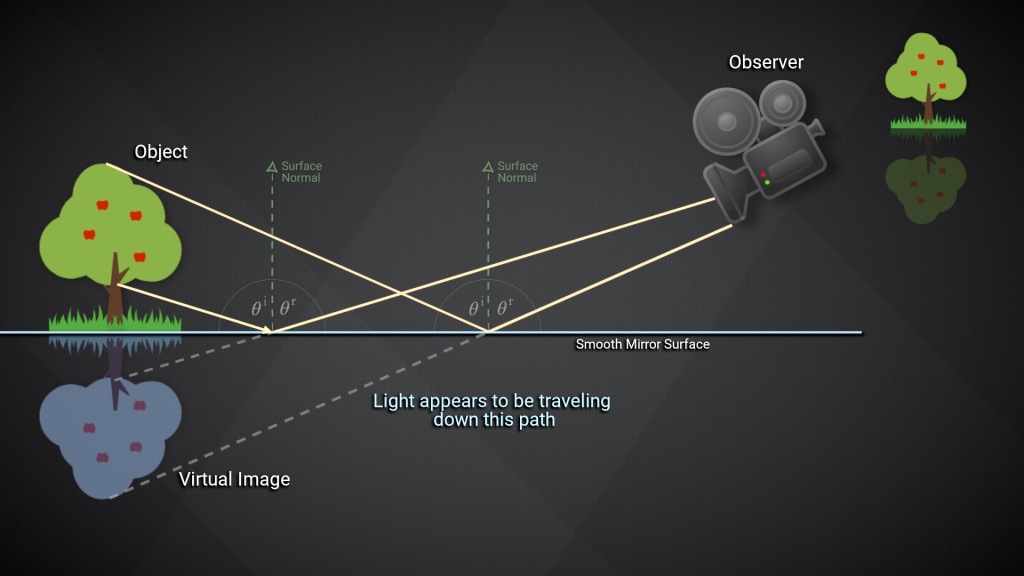
When looking at fully reflective and refractive objects, we are seeing a distorted representation of our surroundings.


Concave/Convex Reflections
When looking at curved mirrors, it is very obvious that the object we are looking at, is a redirected and distorted view of our surrounding environment


Convex Reflections
- With Reflections, light bounces off the material and, depending on the surface shape, changes direction upon reflecting
- Convex shapes cause the light to Diverge – spread apart


Concave Reflections
- Concave shapes cause the light to Converge – come together

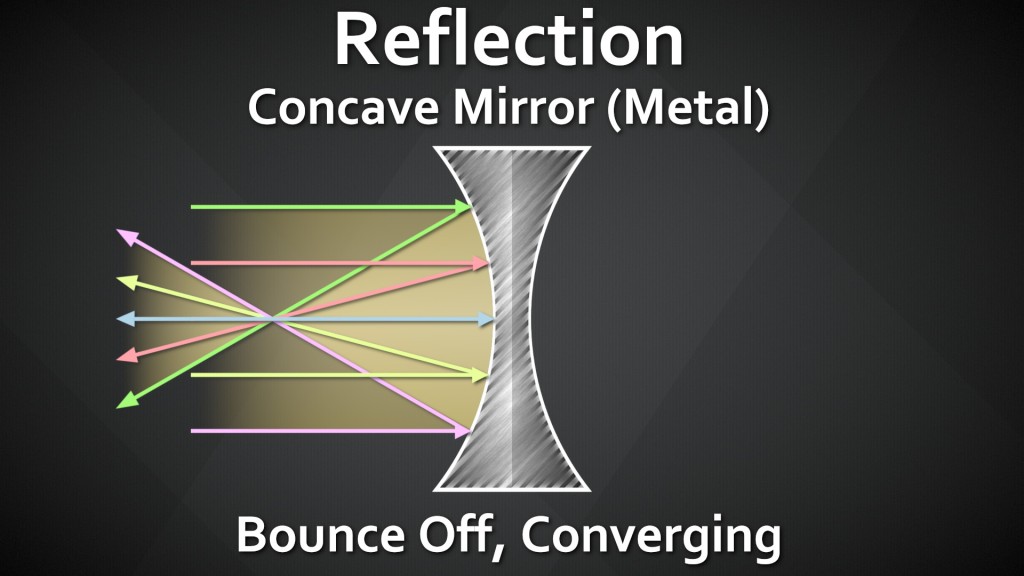
Concave / Convex Refractions
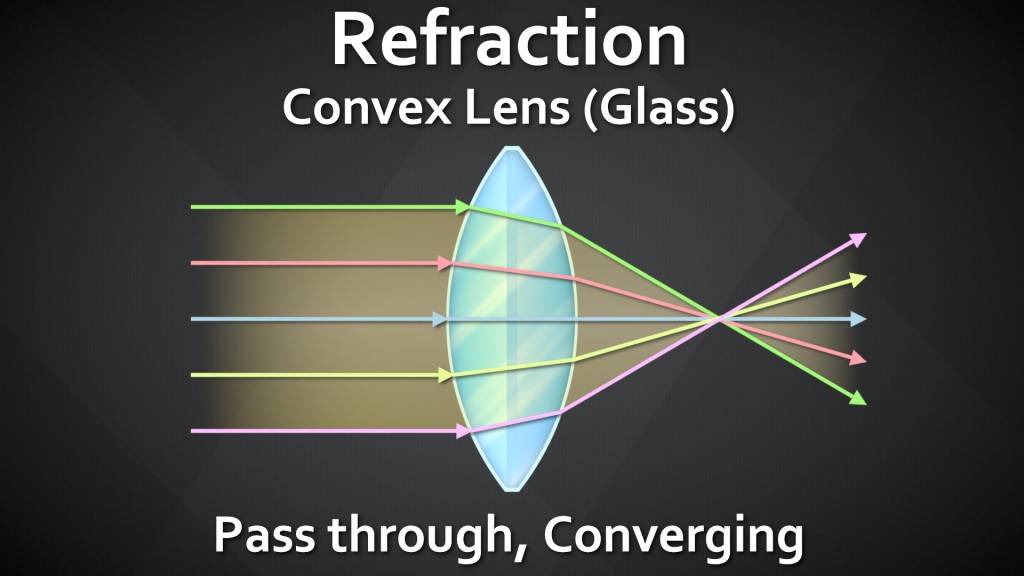
When looking at curved glass, or lenses, light that we are looking seeing through the glass, is a redirected and distorted view of our surrounding environment


Concave Refractions
- With Refractions, light passing through the material and, depending on the surface shape, changes direction upon refracting
- Concave shapes cause the refracted light to Diverge – spread apart


Convex Refractions
Convex shapes cause the light to Converge – come together

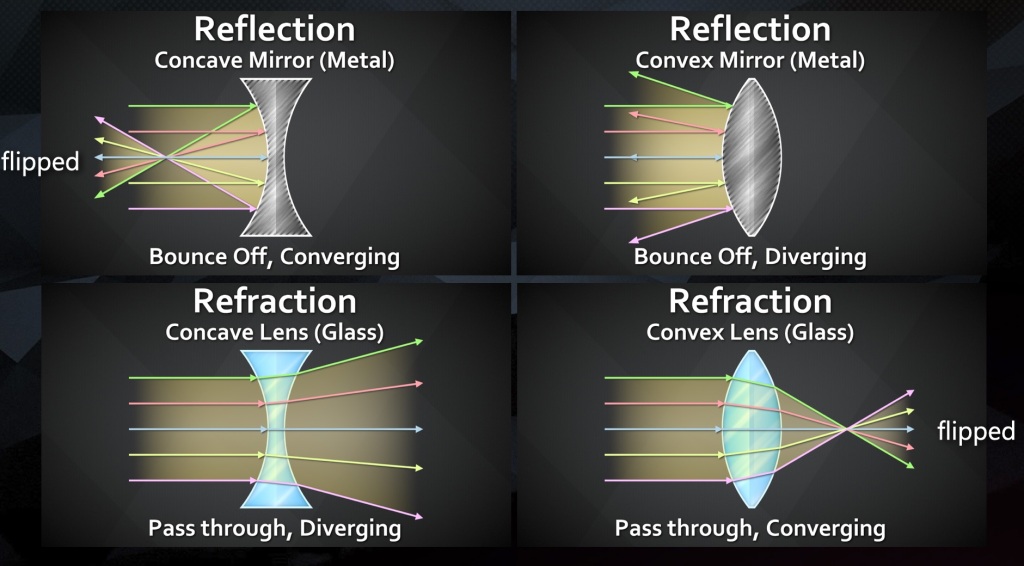
Looking at them all next to each other, we can see Reflections and Refractions are both re-directing the light rays from another part of the scene. The biggest difference is Reflect = Light Bounces off, Refract = Light passes through.
There is No Spoon


There is No Glass Either…


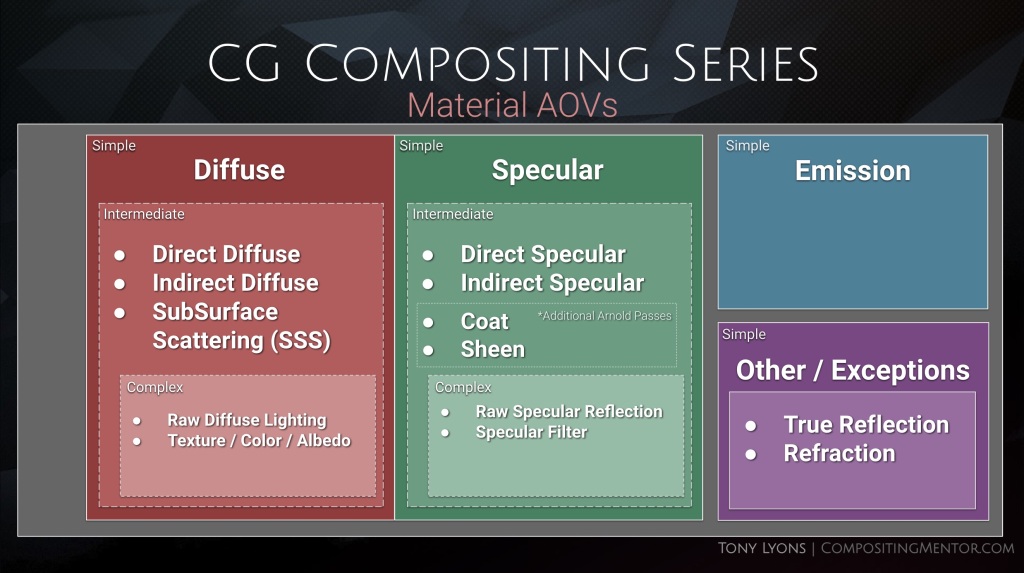
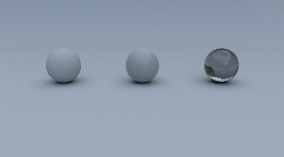
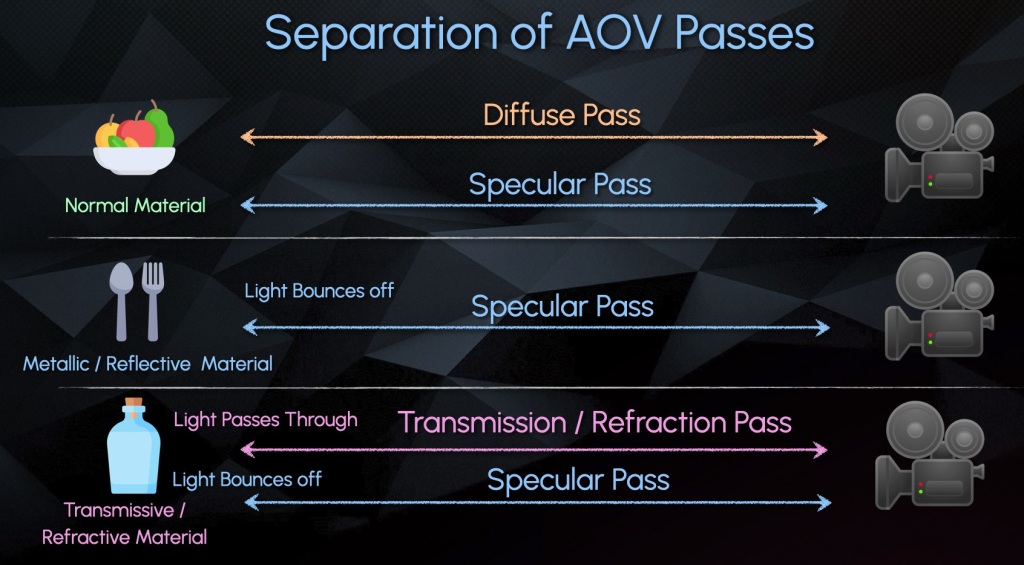
Diffuse – Specular – Transmission (New Category)
Diffuse – All Light Interaction with Material / Object
Specular – All Surface Reflections (Bounces)
Transmission – All Pass Through Refractions



Here is an Example Scene with 1 sided Glass on the left, and 2 sided Glass on the right:

We can see the Direct Transmission shows the Light Source through only the 1 sided glass, but not the 2 sided glass

Almost all information in the 2 sided glass is stored in the Indirect Transmission:

Almost all objects that contain glass in 3D are supposed to be modelled with a thickness, meaning 2 or more sides. So more often than not, your Direct Transmission Pass will be empty and all information will go to the Indirect Transmission. This is also why very often it is not even split up and is just rendered combined as Overall Transmission.
Recap #2
- Transmission – Light passes through
- Refraction – Light redirects.
- The CG pass could be named either or but is often referring to the same phenomenon.
- Specular and Transmission are both similar in that they are capturing light redirecting and showing a virtual image of the distorted surroundings
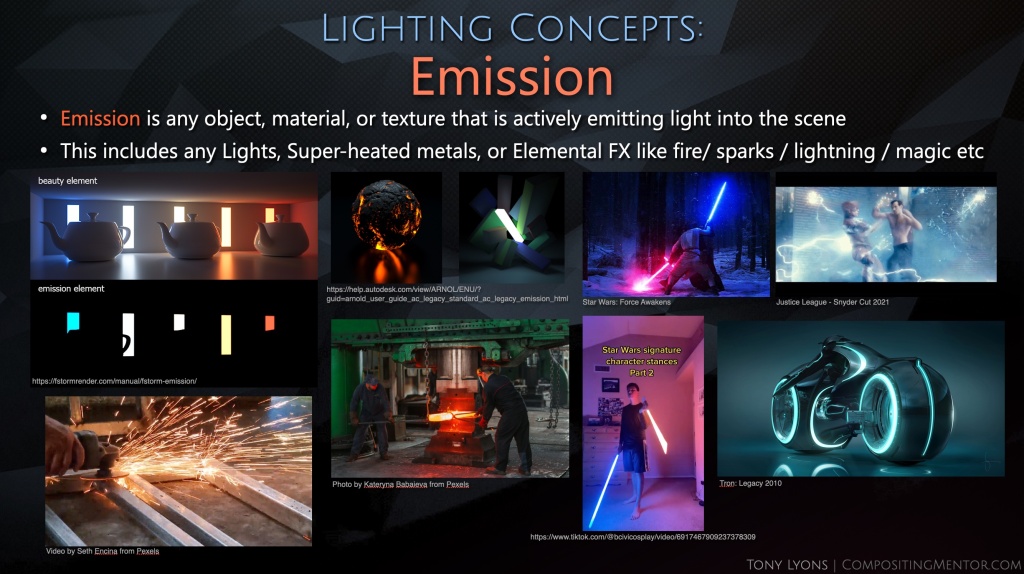
- Emission is the light source
- Diffuse describes the object itself
- Specular Events captures light bouncing off the object’s surface
- Transmission Events capture light passing through an object.
- These all get separated into their own categories.
- Both Specular and Transmission have:
- A Direct pass that show the first reflection or first transmission of light
- An Indirect pass showing all subsequent bounces or pass throughs
- An Albedo Filter (mask)
- Transmissive surfaces like glass are often modelled with 2 sides
- Therefore the light usually passes through 2+ sides and ends up in the indirect pass, and the direct Transmission shows up empty
- Often rendered as just an overall combined Transmission pass, for convenience.
Incorporating Transmission (Refraction) Into AOV Template
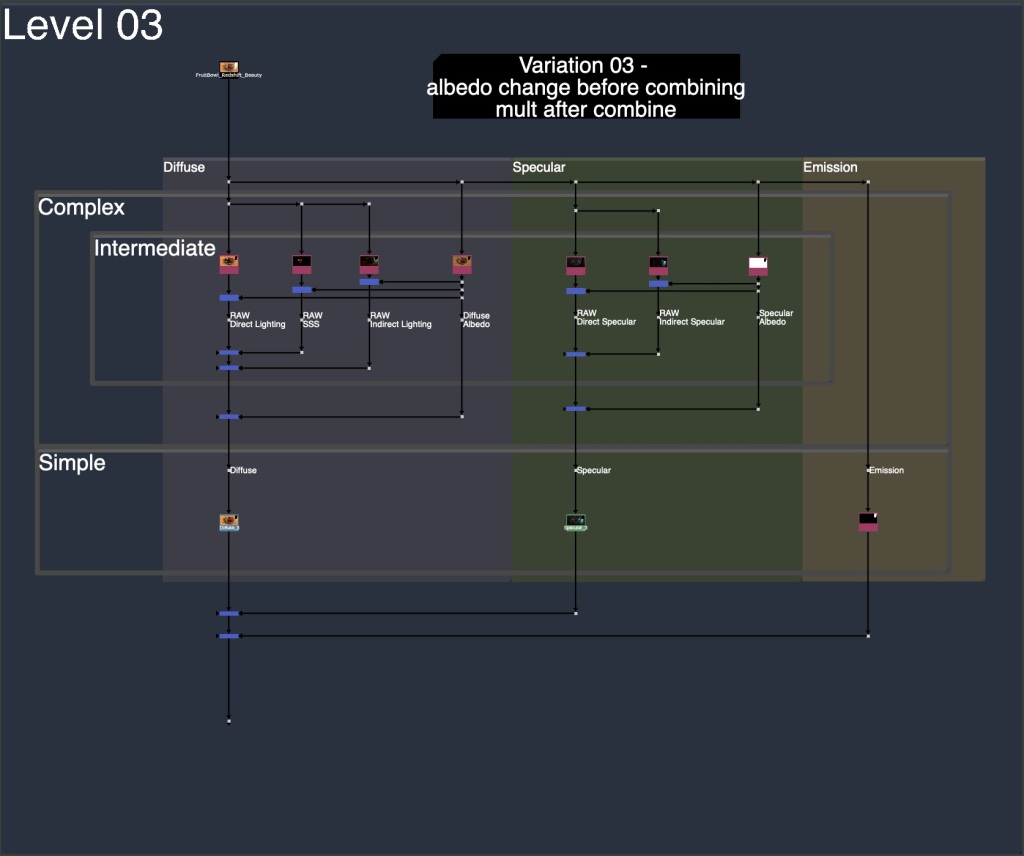
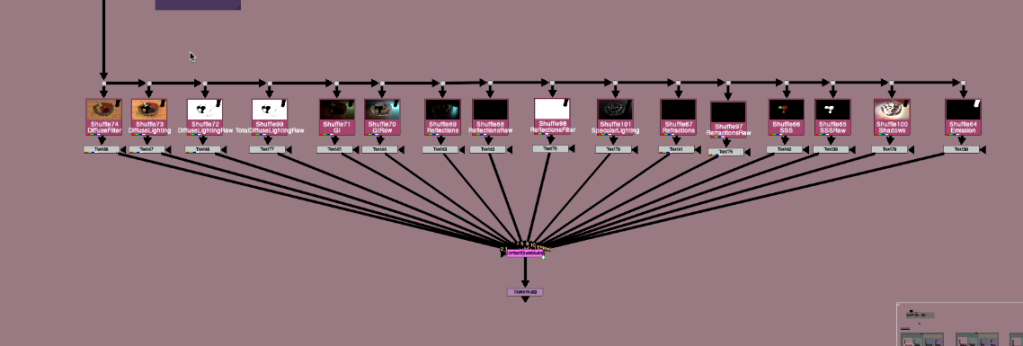
Since most of the Refraction is in the Indirect, there is no need for space for splitting up and adjusting separate direct and indirect, like we do with the diffuse or spec. I recommend combining and keeping the Transmission Section Slim for Space Saving in the Template. I also recommend the layering to go: Diffuse, Transmission, Specular, Emission, Other. To me this was the clearest Layering.

I updated the Material AOV Rebuild Templates in the FruitBowl Renders for Arnold, RedShift and Octane incorporating the new Transmission / Refraction Section.
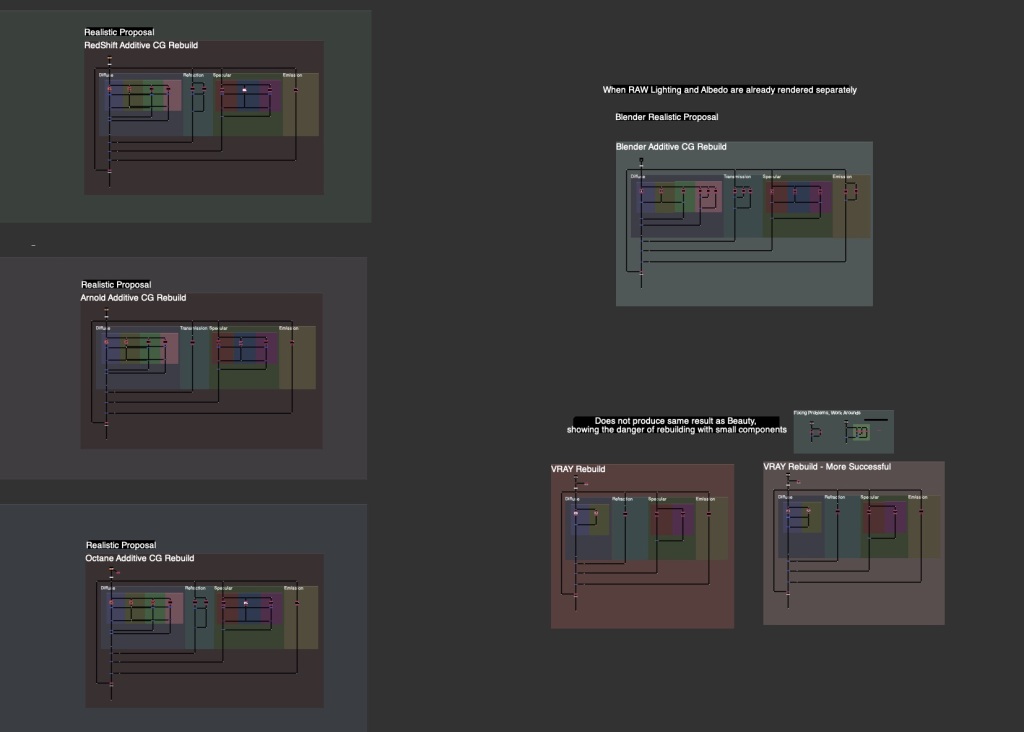
See the Downloads Section at the bottom for links to the whole nuke scripts for learning and template scripts updated per render engine, arnold, octane, redshift.
Handling Planar Mirror Reflections

One approach to rendering Planar Reflections with AOVs is flipping the Camera along the Mirror Plane
Flipping the Camera along the normal of the Mirror Plane will produce a Virtual camera for you to render the Mirrored Virtual Image from the right perspective

If your Object is sitting on top of the 3D origin ground plane, this can be as easy as making an Axis Node, Scaling the Y to -1 and plugging your camera Axis Input into this Axis Node.
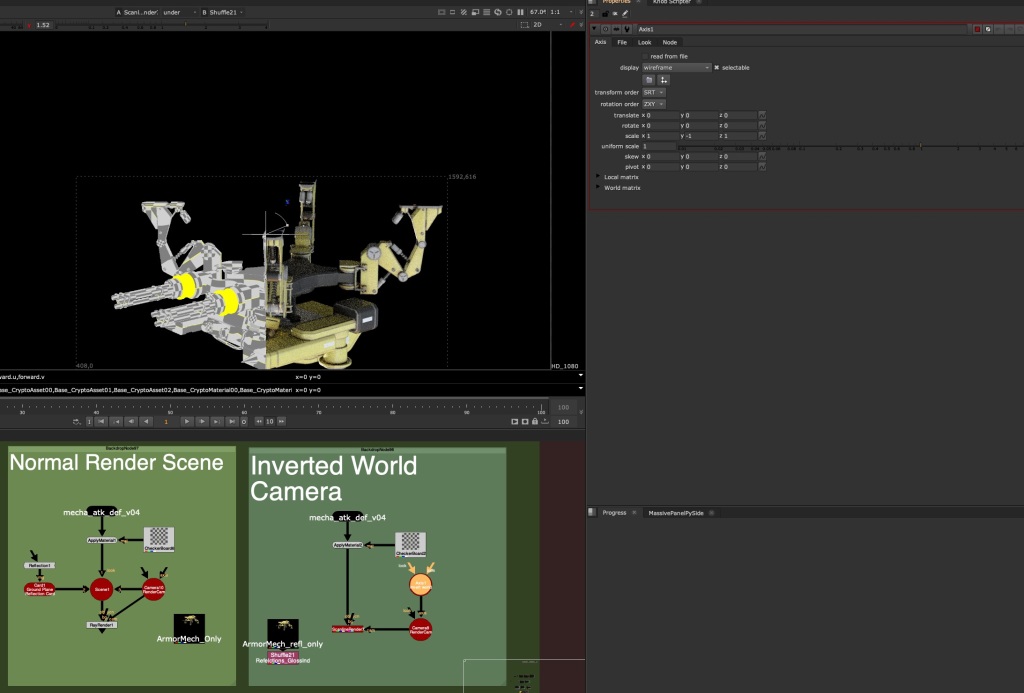
This will view your scene from the perspective of your Mirror. In the above image, you can see after flipping the Camera in -Y, the Nuke rendered result is aligned with the rendered indirect Specular pass. We’ll need to do this method in the Render Application on Lighting side, or pass this camera back to the lighter in order to render the reflection with full AOVs.
Here is the re-rendered Mirror Camera Perspective of the Armored Mech, with full AOVs, matching the original reflection angle:

What about non-ground plane mirrors?
For all oriented mirror planes, the same concept applies, you want to flip the world from the pivot point and orientation of that card along it’s normal facing angle. This is easier to do in 3D applications, but can be done in nuke with a little Matrix Inversion.
I’ve made a tool called MirrorDimension to make this Camera Mirroring super easy. Just stick this node between the Mirror Card in nuke (must have it’s transformations and rotations) and the Camera node. The gizmo is acting as an Axis Node and is just flipping the world along the orientation of the Card input.
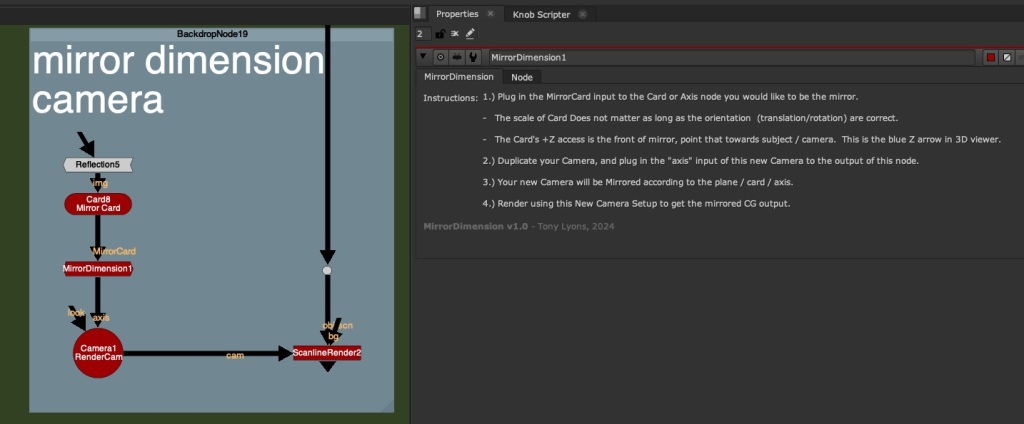
No Settings on the node, just the following instructions:
1.) Plug in the MirrorCard input to the Card or Axis node you would like to be the mirror.
– The scale of Card Does not matter as long as the orientation (translation/rotation) are correct.
– The Card’s +Z access is the front of mirror, point that towards subject / camera. This is the blue Z arrow in 3D viewer.
2.) Duplicate your Camera, and plug in the “axis” input of this new Camera to the output of this node.
3.) Your new Camera will be Mirrored according to the plane / card / axis.
4.) Render using this New Camera Setup to get the mirrored CG output.
Before MirrorDimension Node – Original Camera Position:
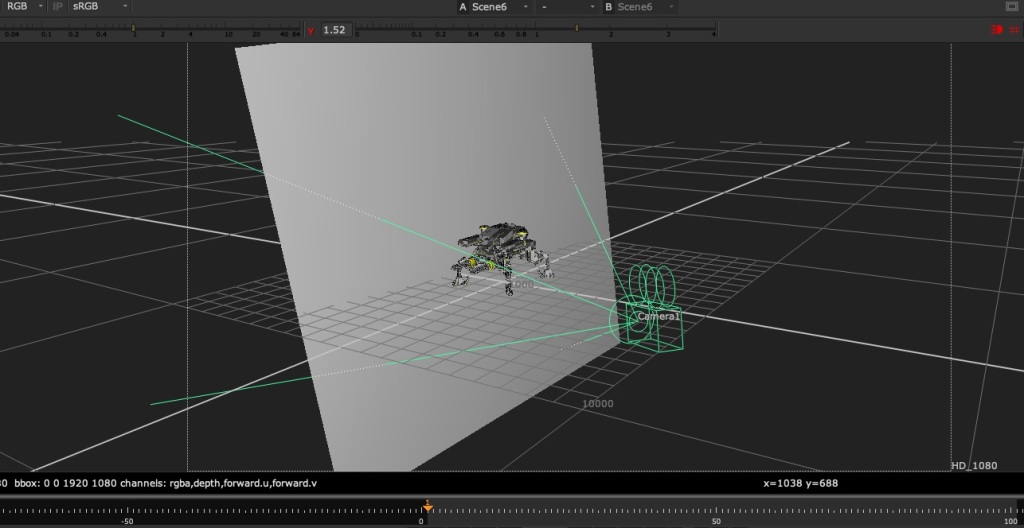
After Mirror Dimension Node Applied –


You would either do this in your 3D scene and render the AOVs or pass this camera to a Lighter to render from this mirror perspective.
Faking Reflections in Comp
If you suddenly need reflections but have no renders, you can use some of the above techniques to fake your reflections.
If you have your Geometry of the object, try projecting the rgba onto the geometry, and rendering it in nuke from the mirror dimension:

If you have no Geometry, but have a Position Pass. Try using a PositionToPoints node, plugged into your render and Position input plugged into your shuffled out Position pass (or select in the dropdown). You can render your rgb 3D point cloud of the object with the mirror camera and fake some reflections. It won’t be perfect, but perhaps in a pinch, it can save your ass and add more realism:

So the next question becomes, what can we do if it’s not a Planar Reflection? or if it’s multiple planar reflection, or surface is curved, or what about Refractions (Transmission) ?
Getting Help from Lighters
There is a serious limit to how much we can do in comp when encountering Indirect Specular or Refraction (Transmission) passes. Many times, if this is something that is a big feature of are shot and requires a lot of comp tweaks, we’ll need some help from our Lighting Department.

Julius Ihle – Head of Lighting and LookDev at Trixter
We talk to Julius Ihle – Head of Lighting and LookDev at Trixter for potential Lighting Solutions to these problems.
Julius is super knowledgeable, and introduces us to Light Path Expressions and Open Shading Language where lighters can help Build Additional AOVs and help us when the situation calls for it.
Julius is also an online educator and keeps a Lighting Blog discussing exactly these topics, check these tutorials out for more details:
Julius’ Blog:
https://julius-ihle.de/?page_id=346
Light Path Expressions
Julius’ Tutorial: LPE Quick Tip #1: Light Path Splitting for Transmission
https://julius-ihle.de/?p=2619
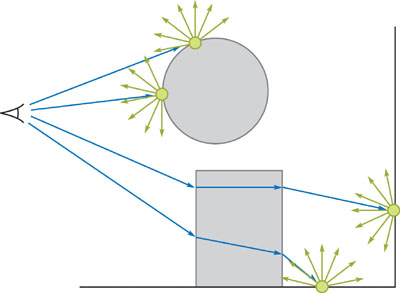
Here is an illustration of the drawing Julius used to explain how renderers are handling Reflection and Refraction Events

In a nutshell, the render engine keeps track of the light ray path and all the events that it undertakes on it’s journey from Camera back towards the Light
Lighters can create new AOVs with custom expressions telling the render engine exactly what parts and what events they want to see in the outputted pass.
Here is a link to the Light Path Expression community GitHub:
https://github.com/AcademySoftwareFoundation/OpenShadingLanguage/wiki/OSL-Light-Path-Expressions
And here is the Arnold User Guide that Julius Mentions in the video to check out for more education:
https://help.autodesk.com/view/ARNOL/ENU/?guid=arnold_user_guide_ac_output_aovs_ac_expression_aovs_html
LPE’s are supported by many renderers so check if the one you are using supports them.
Open Shading Language
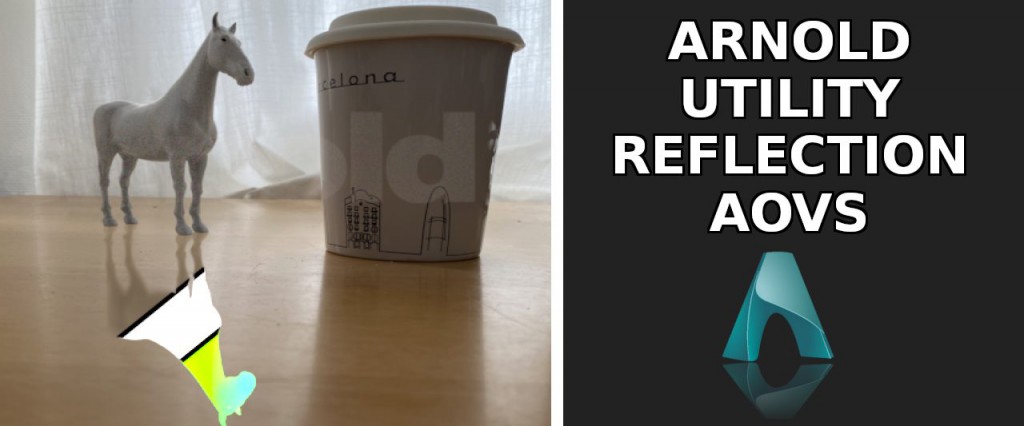
Julius’ Tutorial: Playing with OSL #5: Arnold Reflection Alpha + Utilities
https://julius-ihle.de/?p=2788
There are also Shaders that have been written that can Reflect various AOVs, such as Utility passes and Alpha channel so that reflections can be more useful for us in comp. Julius has written his own shader to do just that, download it from GitHub:
https://github.com/julsVFX/osl
Downloads:
If you haven’t downloaded the FruitBowl Renders already yet, you can do so now:
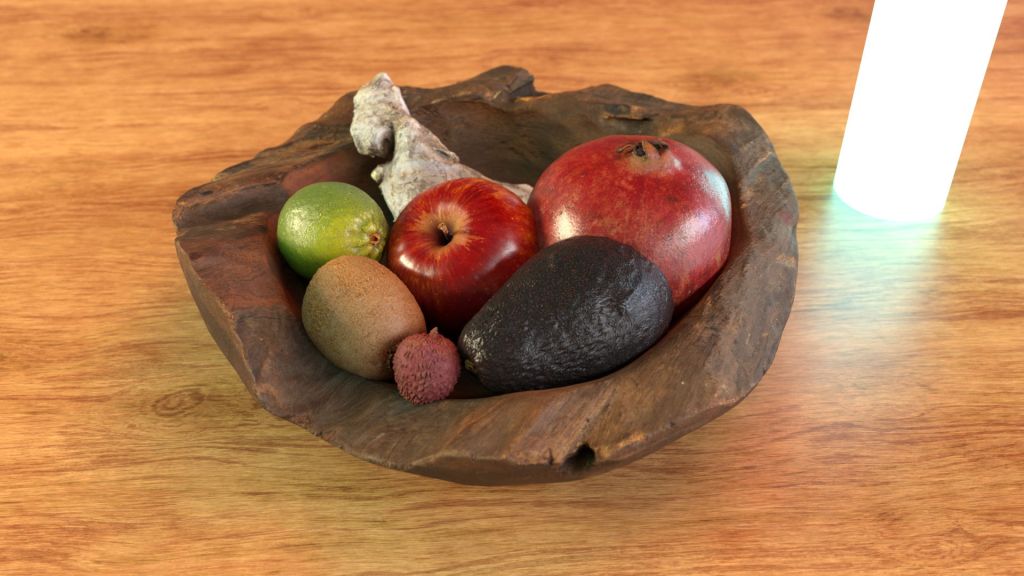
You can Choose to either download all 3 FruitBowls at once:
FruitBowl_All_Renders_Redshift_Arnold_Octane.zip (1.61 GB)
Or Each FruitBowl Render Individually for faster downloads:
FruitBowl_Redshift_Render.zip (569.1 MB)
FruitBowl_Arnold_Render.zip (562.8 MB)
FruitBowl_Octane_Render.zip (515.4 MB)
The project files and the Renders are separate downloads, so if you have already downloaded 1.1 What and Why files or the Fruitbowl Renders, there are a couple ways to combine them to work.
- Either add the .nk script to the previous package (in the folder above SourceImages, with the other .nk scripts)
- Or simply drop the Render files into the SourceImages folder of the new 1.2 project folder

Project Files for this Video:
Along with the fruitbowl renders above, here are the nuke script and project files from this video, so you can follow along:
All Nuke Project Files and template scripts:
CG_Compositing_Series_MaterialAOVs_RefractionsReflections_AllScripts.zip (88 KB)
Nuke scripts included in the above download, but can downloaded individually are:

CG_Compositing_Series_2_5_Material_AOVs_RefractionsReflections_DemoScript.nk
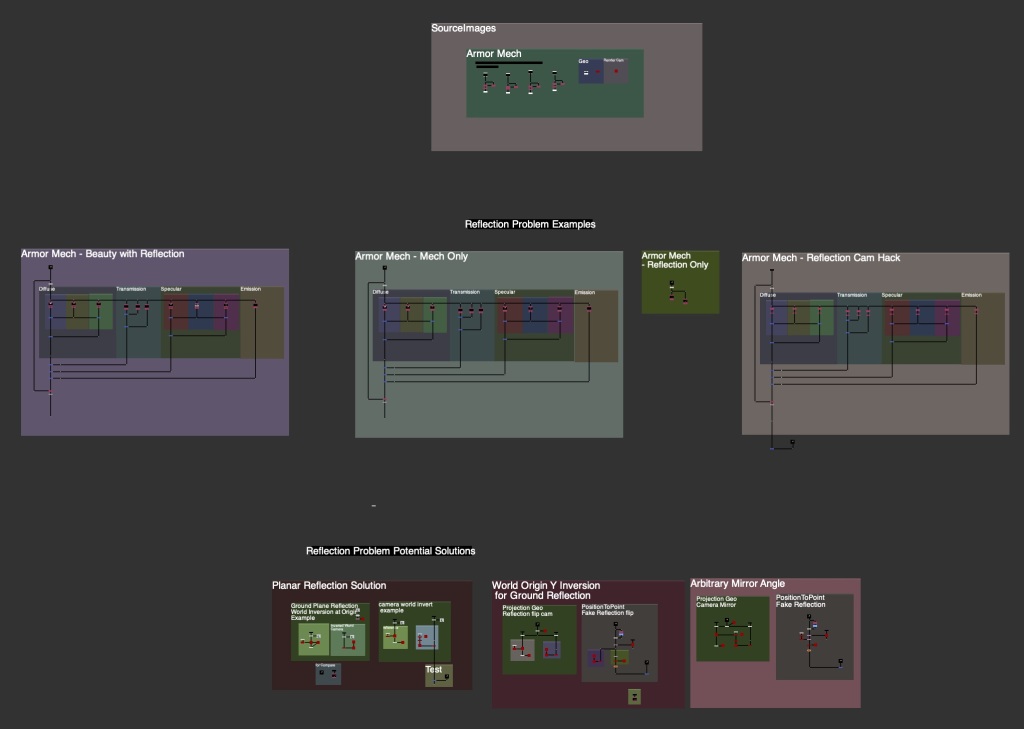
CG_Compositing_Series_2_5_Material_AOVs_ArmorMech_ReflectionsMirror_Demo.nk

CG_Compositing_Series_2_5_Material_AOVs_Updated_Transmission_Templates.nk
I have also updated these Individual AOV Rebuild Templates scripts for specific render engines to include a Transmission Section:
Realistic_AOV_Bebuild_Arnold_Template.nk
Realistic_AOV_Bebuild_Redshift_Template.nk
Realistic_AOV_Bebuild_Octane_Template.nk
Realistic_AOV_Bebuild_Blender_Template.nk
Glass Balloons (Houdini Solaris)

GlassBalloons_Renders.zip (2 EXRs – 101.4MB)
Armor Mech (Rendered in Blender):
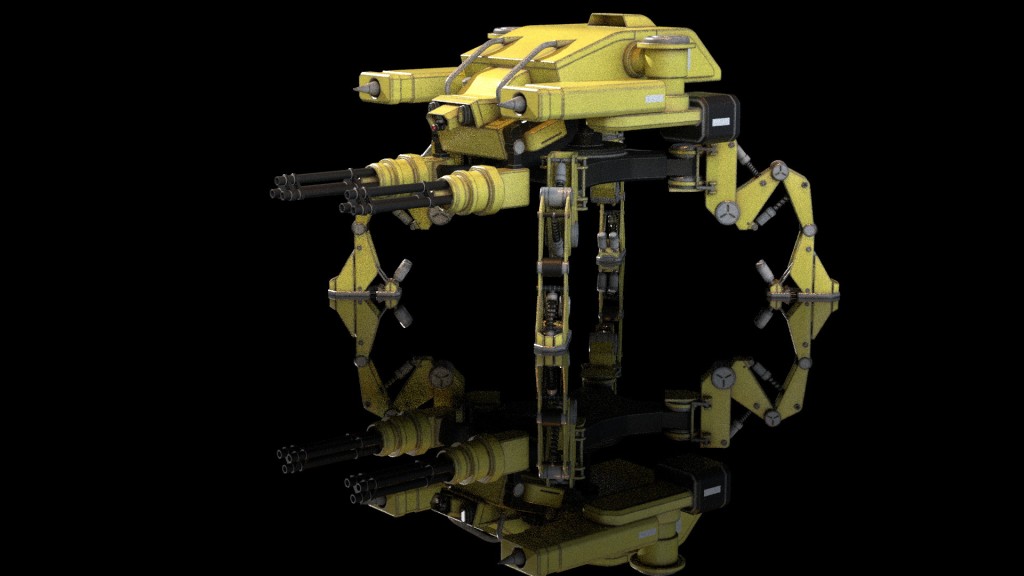
Original model by Numata3D_98 on turbosquid:
https://www.turbosquid.com/3d-models/3d-attack-mecha-quadpod-1993489
4 EXR Renders and Geo (for nuke geo projection demo):
ArmorMech_RendersAndGeo.zip (179.4MB)
MirrorDimension

I am linking to the gizmo on the Nuke Survival Toolkit github, where you can download the raw file or copy/paste the RAW source code from your browser into nuke:
MirrorDimension gizmo
Or download the .nk file here:
MirrorDimension.nk
Or on Nukepedia:
https://www.nukepedia.com/gizmos/3d/mirrordimension
Blender JunkYard Scene:
Scene from https://www.blender.org/download/demo-files/

Blender ClassRoom Scene:
Scene from https://www.blender.org/download/demo-files/

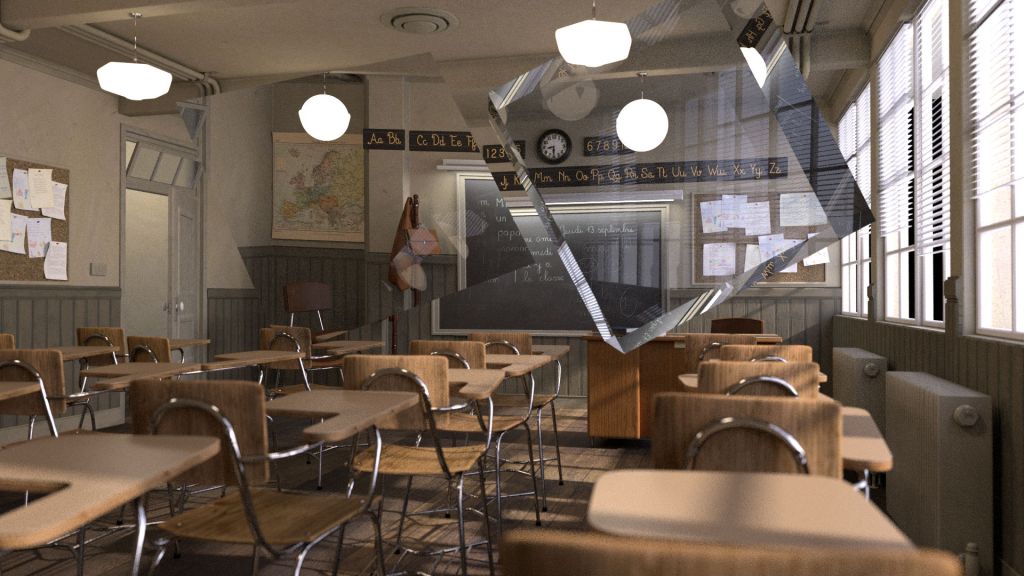

3 Render Files:
BlenderClassRoom_All_Renders.zip (213.6MB)
VRay Room Render:

Vray Room – Can be downloaded from this website, look for “download example scene” (36.6MB):
https://www.chaos.com/blog/how-to-use-cryptomatte-render-elements-in-v-ray-for-sketchup
Since I am using Stamps in the script, all renders can be swapped out at the top of the script where the “SourceImages” Backdrop is, and the rest of the script will get populated correctly.

Slide show PDF
Here is a PDF version of my slideshow in case you would like to save for future research or review:
References / Research
Light Path Expression Doc:
Github Wiki: OSL Light Path Expressions
Arnold Light Path Expression Help and Examples:
Arnold Help: Light Path Expression AOVs – Arnold User Guide
Julius Ihle Blog
Julius Ihle’s Github page : julsVFX/osl
Playing with OSL #5: Arnold Reflection Alpha + Utilities
LPE Quick Tip #1: Light Path Splitting for Transmission
Websites:
Refraction Wikipedia
Transparency_and_translucency – Wikipedia
https://notes.thatother.dev/physics/refraction
https://help.maxon.net/r3d/cinema/en-us/Content/html/Integrated+AOVs.html
https://study.com/learn/lesson/transmission-light-wave-examples.html
Basics of creating glass materials in Corona renderer and 3Ds Max
3Delight Glass – Storage for referenced pages – 3DL Docs
https://macdesignstudio.wordpress.com/tag/reflection
Light Pipe Design: How TIR & Refraction Come into Play
Light and color. – ppt video online download
On BigCo Leaks: Transparency and disclosure
Can You See Through Me? | Lesson Plan
https://wbbsesolutions.guru/wbbse-solutions-for-class-10-physical-science-and-environment-chapter-5
FAQ/Combining 3D Passes – VFXPedia
Refraction – Definition, Refractive Index, Snell’s Law
The Physics Behind Rainbow Formation
https://www.geocities.ws/rmackrell509/4thSpring.html
What are the uses of refraction in our daily life?
What is the Index of Refraction? Measurement, Definition & More –
View topic – Help understanding Refraction, SSS and Transmission passes?
PPT – The Basics of Refraction PowerPoint Presentation, free download – ID:2558034
Molecular Expressions: Science, Optics, and You: Light and Color – Refraction of Light
https://slideplayer.com/slide/16831983
https://global.canon/en/technology/s_labo/light/003/02.html
Delivering VR in Perfect Focus With Nanostructure Meta-lenses
https://osa.magnet.fsu.edu/teachersparents/articles/lensesgeometricaloptics.html
What is the difference between Translucency and Transparency?
YouTube Links:
Light Absorption, Reflection, and Transmission
How is Light Absorbed, Reflected and Refracted
Why does light bend when it enters glass?
Reflection, Refraction and Absorption
How To Demonstrate Light Bending or Refraction


